Thursday 13 August 2009

Get your Sugar on a Stick!!


Getting started

We need a few things:
  1. A USB with a minimum capacity of 1GB.
  2. Strawberry iso image, this is actually optional the program we will be using can download it for you in the installation process but it's 379MB, so for a slow connection I suggest you download it as a torrent from here.
  3. The LiveUSB-Creator. Note that this software works both on Windows and Linux.

Let the installation Begin!

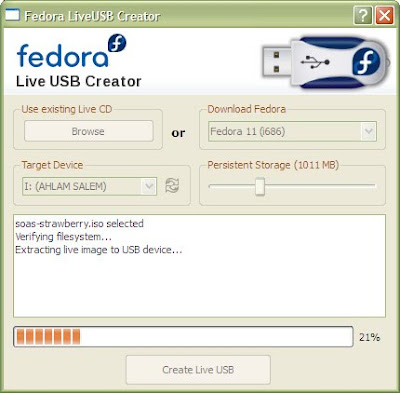
The first thing you need to do is extract the contents of the LiveUSB-Creator. Once that's done plug in the USB device you plan to install the image on. Now double click on liveusb-creator.exe, this window should pop up.
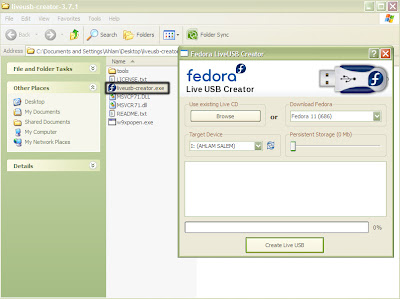


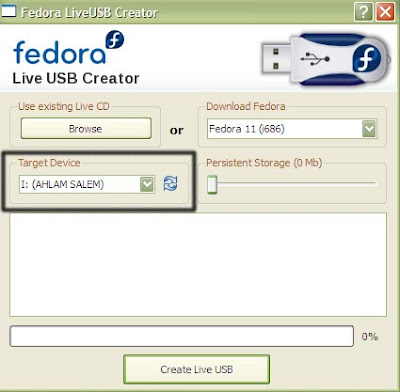
Now make sure the Target Device is set to the USB your aiming to install Sugar on.


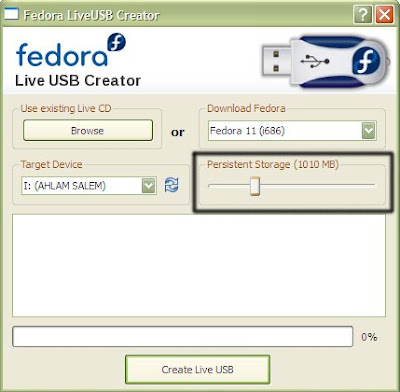
Next move the slider to set how much space you would like to grant for the storage of Sugar, remember the minimum space required is 1GB. As you can see from the picture below I used the minimum space required.


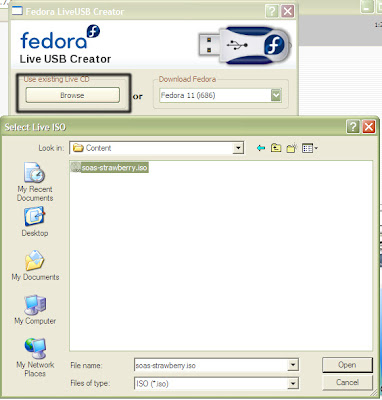
If you already have the strawberry image, all you need to do is click browse and select the iso image.


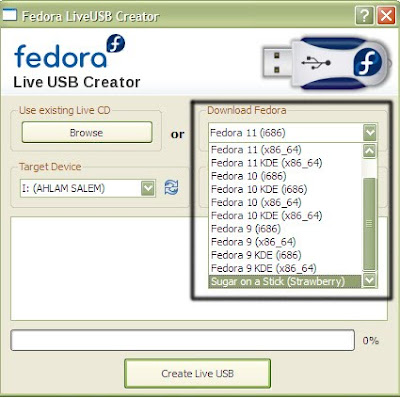
If you don't have the iso image, simply select Sugar from the drop down list on the upper right corner.


We're almost there!! Now click the Create Live USB button. If you already have the strawberry image this should only take a few minutes, if you don't it will take quite a while due to the fact it needs to download the image before it can begin the installation.


After the installation is complete you can close the program and try out your Sugar on a Stick. Safely remove your USB but leave it in the port. If your using a desktop it might be better to plug the USB into one of the rear ports for easy detection.

Now you can restart and it should automatically boot in from your USB. If it doesn't then you should check your BIOS settings to make sure that the option for booting from a USB is enabled.

The nice thing about Sugar on a Stick is that the mouse isn't so crazy, it doesn't jump around all the place as in the Live-CD. Also with Sugar on a Stick your work is saved to your USB. But there is a problem with the Arabic language setting, I tried it and some of the words were still in English and some were in Arabic, aslo they used the writing technique where the letters are disconnected, for example ن ظ ا م ا ل ت ش غ ي ل which I find annoying, I only tried the Suadi Arabia choice maybe the others are different I don't know.
Saturday 8 August 2009

Creating a Bootable XO-Live CD


Getting Started


Before we get started you will need to have the following:
  1. The XO-Live CD iso image, this can be found here or here. Make sure what you download has the name "XO-Live" and the .iso extension. Or you can download as a torrent from here.
  2. A program to burn the iso image like Nero. You can also find free software that will do this task like IsoRecorder, you will notice there are different versions you can download depending on what version of windows you have, make sure you download the right one, on the website they show you how you can make sure in case your having trouble figuring it out.
  3. An empty CD of course.

Burning the iso image with Nero


The following procedure is done with Nero 6, other versions will be similar, the main commands is what you will need to pay attention to.

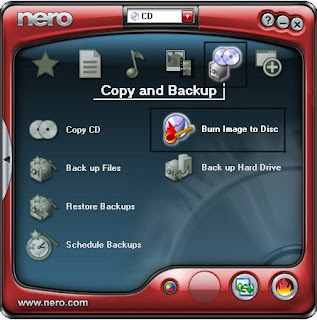
1. First place an empty CD in your disc tray. Then open Nero Start Smart, choose
Copy and Backup --> Burn Image to Disc.


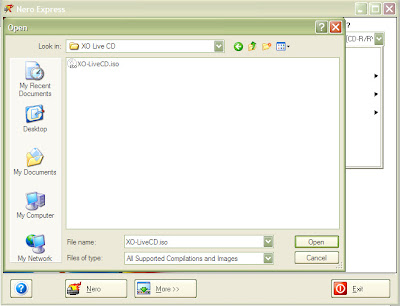
2. Then a browse window will pop up automatically, go to the location you have the iso
image in, choose it, then click
Open.


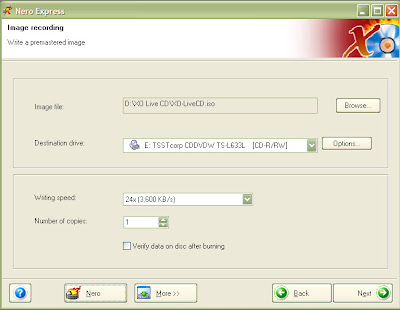
3. Then you'll get the window below, simply press
Next.


4. Now the burning process should begin.


5. After a few minutes you'll get a message notifying you that the process is done. Press
Ok -> Next -> Exit.

That's all! Now you have a bootable XO-Live CD ready to be used :D. Just restart your computer with the CD in the tray & it will automatically boot you into the Sugar OS. The CD comes with plenty activities for you do dive into, so Have fun!!


Burning the iso image with IsoRecorder

If you have IsoRecorder installed you will notice that it has no start up item in the programs list, no icon on your desktop, nothing. Well the reason is you don't have to start up the program to use it, you use it through the right click mouse button. I'll show you what I mean.

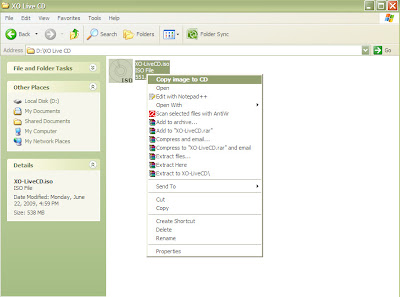
1. Navigate to the location of the iso image you have stored on your computer. Right click on the file, choose Copy Image to CD.


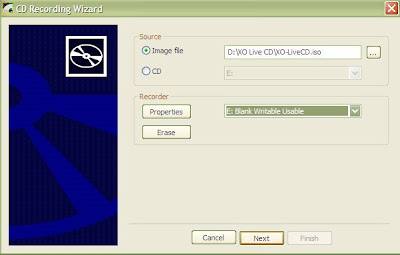
2. A window will pop up - of course you have to have an empty CD in your tray at this point, if your CD is not empty & it's erasable the program can erase it for you then you can continue - Simply click Next.


3. The burning process will take place, it only needs a few minutes & then your done :D.

Now your ready to have fun with all the activities on the XO-Live CD!! Just restart & it will automatically boot into the Sugar environment :D. I might just go play with mine now ;).